


After watching this video, you will know how to use digi papers, stay organized with storage sections & navigate with bookmarks to your most frequently visited pages.
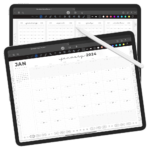
Hi, I’m Brooke of brookebot.com. This is the third of 3 videos in a series outlining the key features and functions of Brookebot Digital Planners. In the first video of this series we navigate dated planner pages with dated links — yearly & monthly calendars, weekly pages, and daily pages. In the second video, we examine weekly & daily layout designs.
What we did not go over in either of those videos were these other links down here in the navigation bar. These buttons lead to the supplementary pages of your planner — the front cover, back cover which doubles as a digi paper index, 4 storage sections, 5 bookmark dividers & the nav bar index. So, in this video we’ll tap on all of these links to navigate through these helpful pages in your planner.
The first button in the navigation bar is for the front cover. The last button is for the back cover; this page also serves as a digi paper index. There are 46 types of digi paper rulings with variations in line thickness and spacing — dot grid, solid grid, dot lined & solid lined. Each circular paper sample in the digi paper index is a tappable link that takes you to the full page. Each full page has a built-in navigation bar which allows you to quickly access other parts of your planner.
Digi paper can be placed behind one of 4 storage sections or behind any dated page & can be used for all kinds of different things. Create your own habit tracker layouts, keep a journal, take notes for a meeting, brainstorm ideas with some mind mapping, organize your sticker collection, store frequently used planning elements, or anything else you can dream up. Almost everything you might do with loose leaf paper in a traditional planner or binder, you can do with digi paper & even more because it’s digital.
Duplicating digi paper pages and placing their copies can be achieved a couple of different ways. Either “Duplicate” the original paper in thumbnail view and drag the group of copies to relocate them OR “Copy Page” from the 3-dot menu, “Add Page After” & “Paste Page” in thumbnail view. Then from there you can duplicate the pasted page multiple times. Digi paper can be duplicated as many times as needed, potentially offering thousands of copies. Though, I’d never recommend maintaining a several thousand page document, but that is a totally different topic for a totally different video.
There is one thing to keep in mind. Each thumbnail in the index is permanently linked to its matching full-page digi paper — the one original digi paper. So, let’s say we accidently take one of these original digi papers, move it somewhere else in the planner, and write on it. When we come back to the index & tap on that thumbnail, the page we land on will already be in use. You could duplicate that page and then clear its contents, but that’s not an efficient way to duplicate digi paper throughout the life of your planner. So, be sure to leave the 46 original papers in their original place & keep them clean for future use. Write on and relocate copies of the originals because copies won’t be bound to that thumbnail in the index.
Storage sections can not only help keep digi paper organized, but they can also be used to stash other types of digital documents. Throughout the year, we collect a multitude of things that are relevant to planning: bills with due dates, newsletters with event details, calendars of scheduled work hours, or class syllabi with project deadlines. Instead of hunting these references down each planning session, keep them tidy & at your fingertips in 1 of 4 storage sections.
To access a storage section directly, tap its link in the navigation bar. Here are the links for sections “A” & “B”, and here are the links for sections “C” & “D”. To access the pages you’ve placed inside a section, just swipe left. When tapped, the top of each section page leads you to the nav bar index which offers an overview of all 4 sections. Tap each framed area on the nav bar index to navigate your way back to the section page. You can also access the nav bar index by tapping the 3-lined “hamburger” button in the navigation bar.
Write or type a list of contents on the storage section page itself & on the respective framed area of the nav bar index. Personally, I don’t like to spend time updating labels, so I tend to use very generalized terms to describe a section’s purpose. Though if you prefer to keep more detailed lists, there is plenty of space to do so. Considering the nav bar index is intended to be used for a quick glance, you could also split the difference. To do this, keep a super simple label on the nav bar index and a more descriptive list of section contents on the section page itself. The purpose of your planner’s storage sections will become ingrained with routine & over time, you may find that you no longer need to rely on labels to know what’s in them.
Bookmark dividers are meant to be moved freely throughout your planner and placed in frequently visited spots. Tap any flag, star, or heart in the navigation bar to access its respective divider. Then swipe left to see the page behind the divider — the spot you choose to mark as a favorite. Tap the top of each bookmark divider to access the nav bar index which offers an overview of all 5 bookmarks. Tap each framed area on the nav bar index to navigate back to the bookmark divider. Remember too that the nav bar index is accessible from any page by tapping the 3-lined “hamburger” button in the navigation bar.
I’ll share an example of how I use one of my bookmark dividers. Since I frequently visit my weekly page throughout my day, that’s where I place my heart bookmark. At the beginning of every week, I move the divider to the next week. No matter what page I’m on in my planner, I can tap the heart in the nav bar & swipe left to quickly get back to the current weekly page. I also use the bookmark page to keep a list of what I call my “on deck” tasks. So, the page itself serves as a temporary holding bay until I am ready to move the tasks into my official weekly plan.
Using bookmarks saves a little time & slightly reduces mental effort. Shaving a few seconds off the time it takes to complete any frequently performed task really adds up in the long run. Avoiding that little bit of extra mental strain frees your brain up to continue focusing on the task at hand. So sure, I can get to that weekly page pretty quickly with dated links, but by forming this habit of always tapping the heart in the navigation bar, I’ve become a little more efficient. You can customize the way your navigation bar works for you by coupling any of the 5 bookmarks with pages you access most frequently. You can write or type a descriptive label on the bookmark divider itself & on the respective framed area of the nav bar index. Optionally, you may choose to use these versatile dividers in the same way you use storage sections — it’s totally up to you.
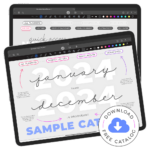
You can visit brookebot.com to see color highlighted links for the supplementary pages that we covered in this video. There is also a digital planner sample catalog available to download (for free) from brookebot.com. The catalog allows you to zoom in & out, write on, and inspect page samples on your device & in your preferred note-taking app. Remember too that this was 1 in a series of 3 videos covering 2021 Brookebot Digital Planners. Be sure to watch the first video where we use dated links to help us navigate through planner pages quickly & then the second video where we examine weekly and daily page layout options.
Thanks for watching! I’ll see you in the next video.